Posted on

Designing Greeting Cards Digitally

Designing Greeting Cards - my custom cartoon portrait process

A while ago I described how I create custom cartoon portraits when designing greeting cards to order. My drawing process has changed a bit since then though, so I thought I’d do an update.

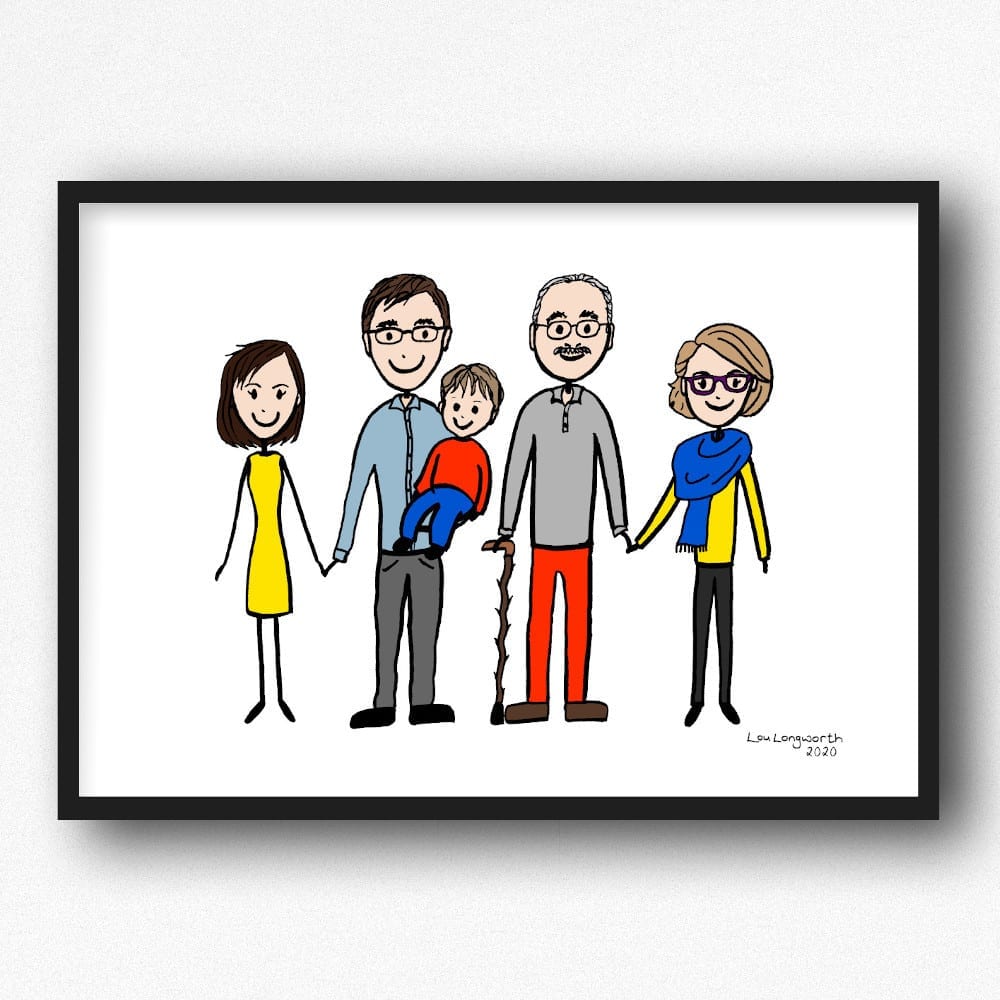
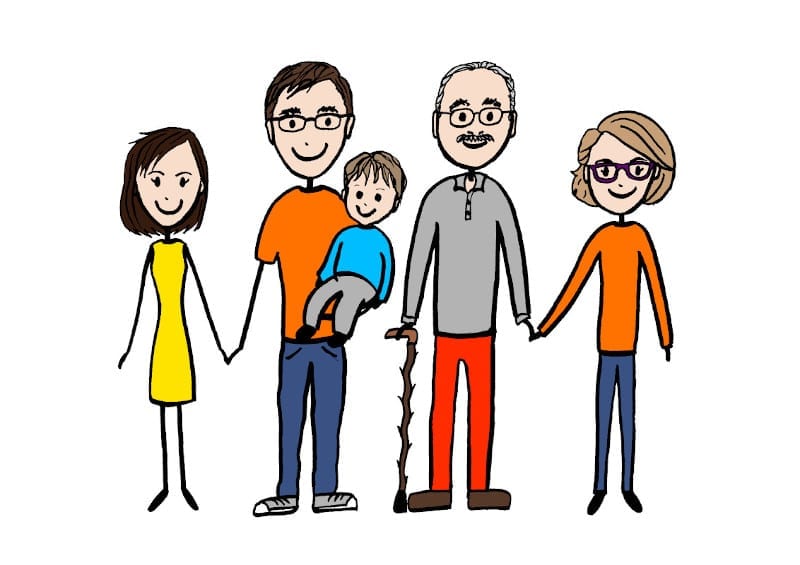
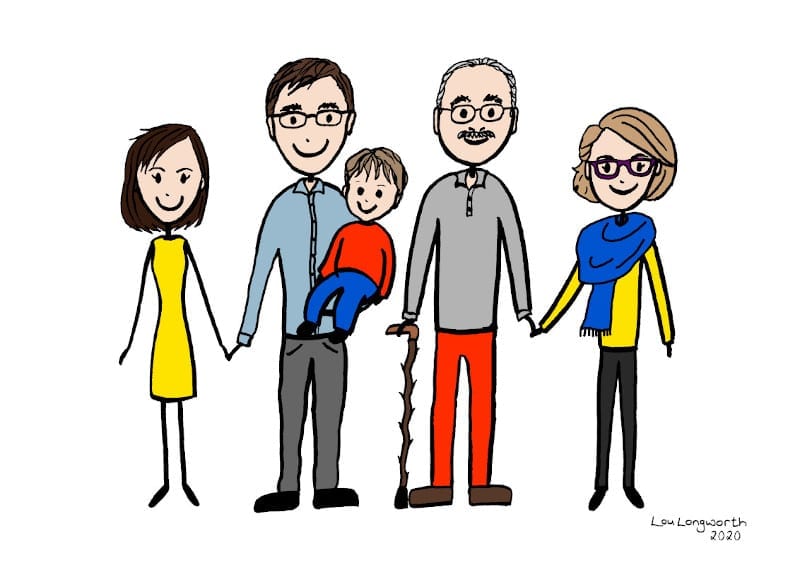
I designed the cartoon portrait below for a graduation card using my new process so I’ve used it as an example. There’s another example at the end of this post too, which shows an anniversary cartoon portrait.

The main reason for the change is that I finally invested in an iPad and Apple Pencil for my greeting card business. And I’m so glad I did! Designing greeting cards digitally has made the process much quicker, both for drawing custom cartoon portraits and for creating other new greeting card designs.

I chose to use Procreate, which is an amazing drawing app. It has zillions of different ‘brushes’, including all sorts of pencils, pens, paints, chalks, charcoals and textures. Even aside from drawing designs for greeting cards I’ve had terrific fun experimenting and creating all sorts of weird stuff! And it’s all available instantly, which means I don’t need extra time to be able to unpack my art materials and put them away again afterwards.

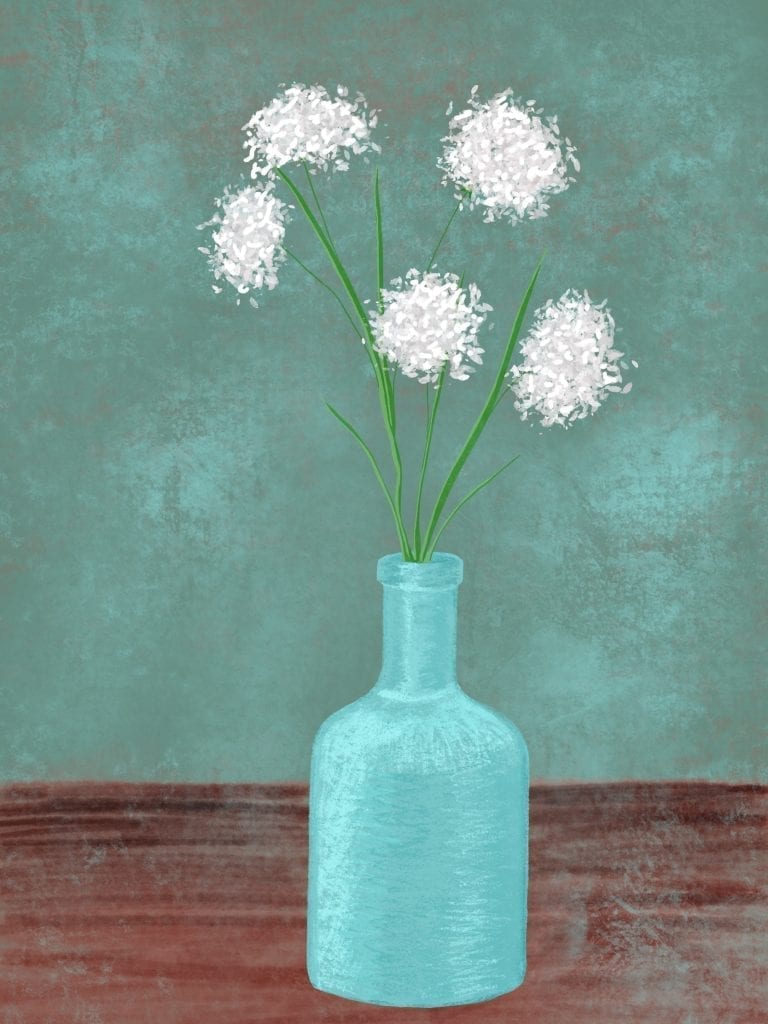
Here’s one of the ‘paintings’ I created just to get used to what I could do with my new tools:

bottle with flowers

But back to my drawing process when designing greeting cards…

Creating custom cartoon portraits

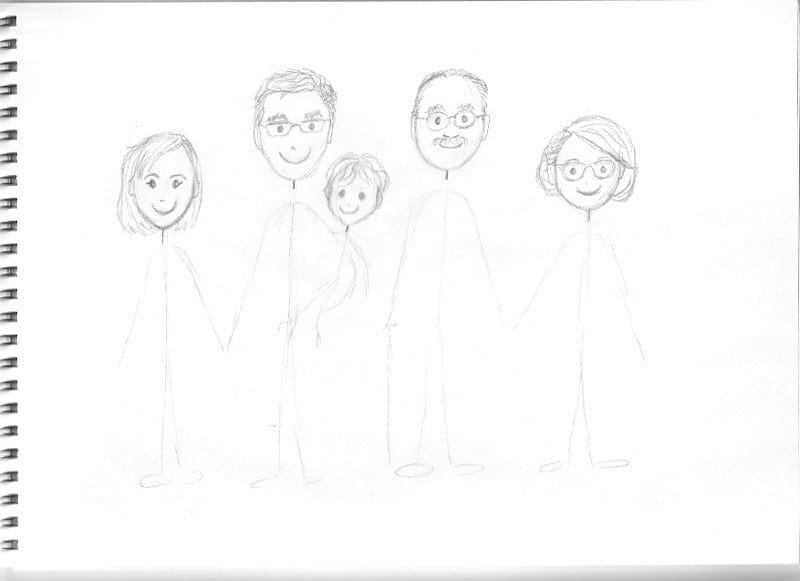
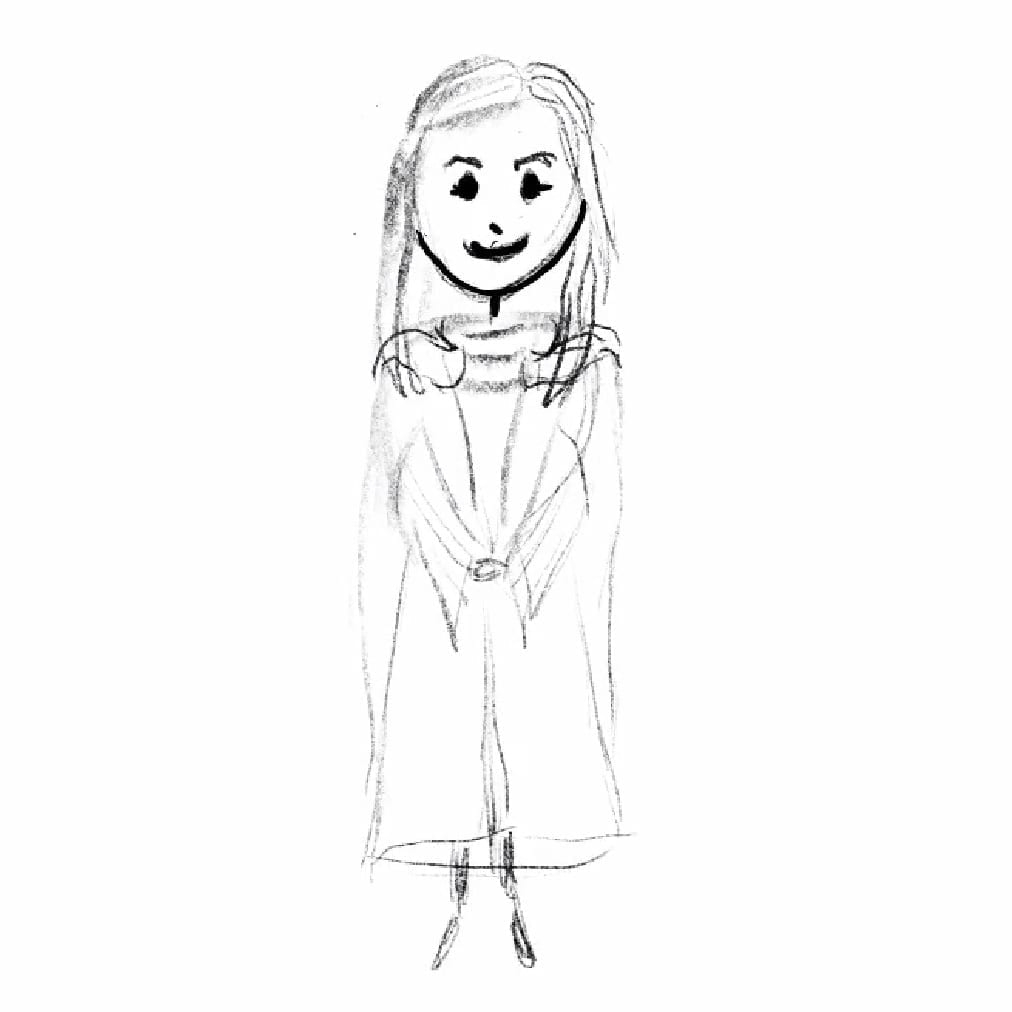
I start by creating a canvas of the right size and then use the ‘6B Pencil’ to sketch the drawing in – this part is almost identical to how I started on paper (see here) except that I’m drawing straight onto the iPad with the Apple Pencil, instead of using a real pencil and paper. Next I sketch out the basic outlines and then fill in details until I’m happy with the overall drawing.

Pencil sketch
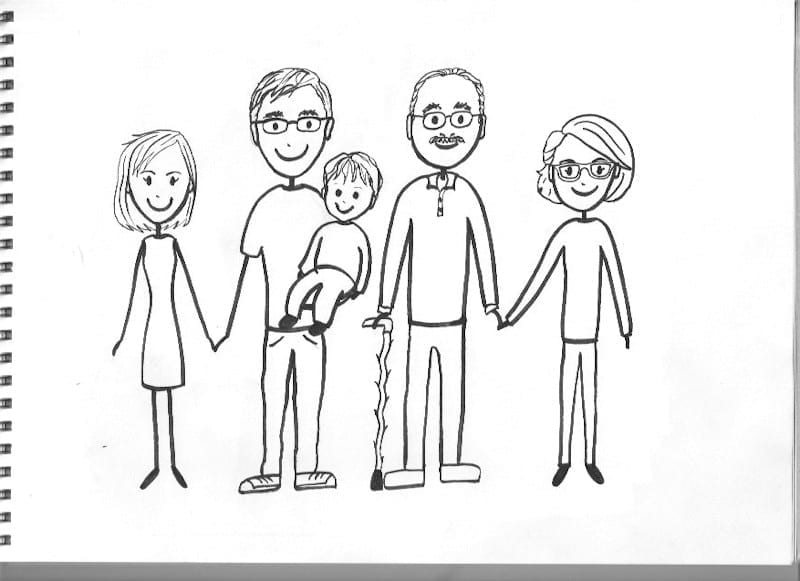
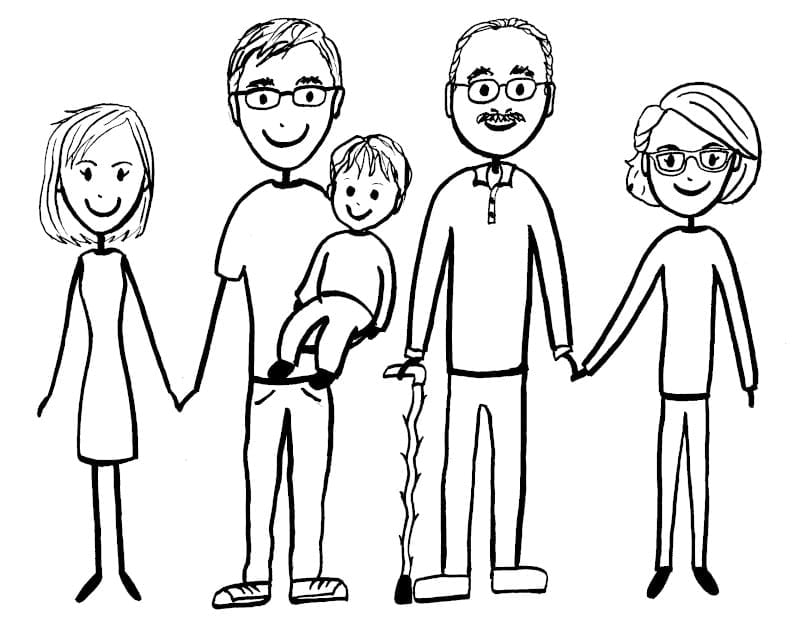
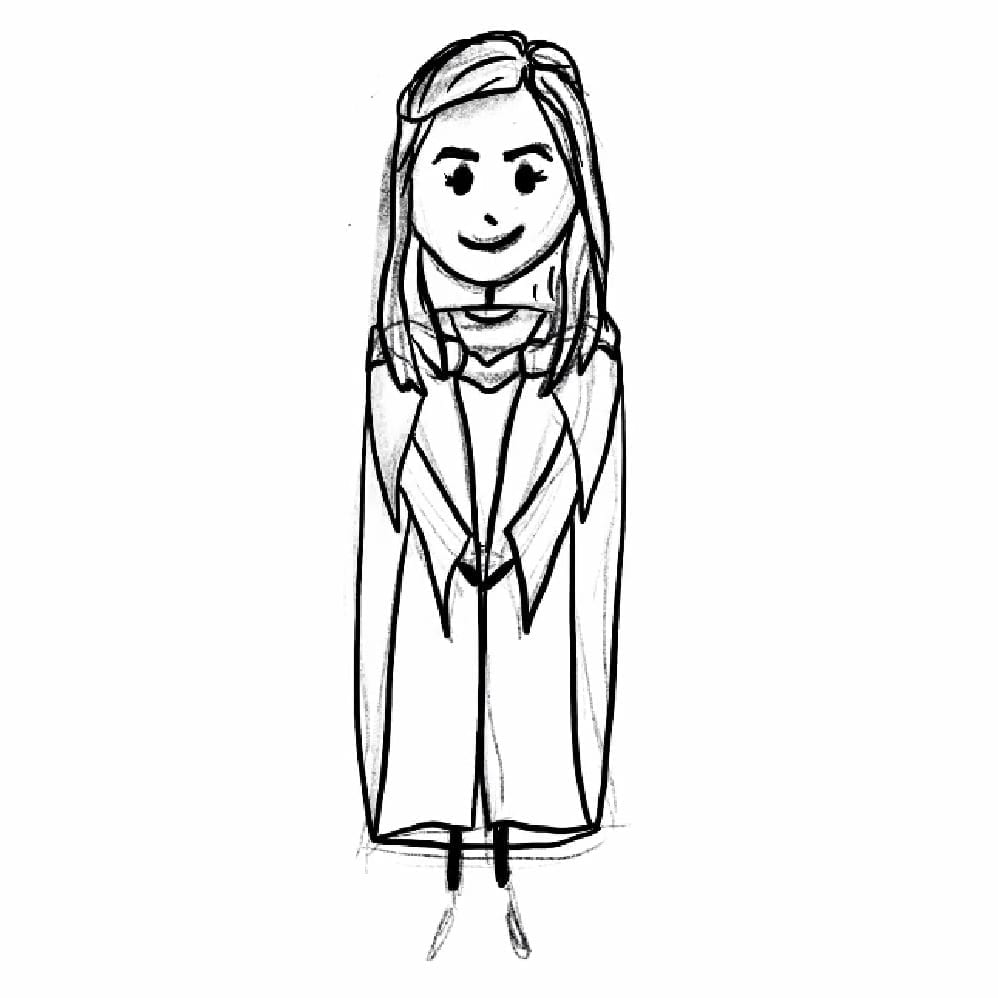
I then create a new layer above the pencil sketch. On this new layer I draw over the pencil sketch with the ‘Studio Pen’. (I find it gives a very similar look to the brush pens I use on paper). This part is where I save a lot of time, as if I make a mistake I can just erase and redo it. Before I had to leave it then edit it in my Gimp software using a mouse, which wasn’t that easy.

I also love that I can zoom right in (especially useful as my eyesight is awful!) This lets me get smaller details just right and get rid of small marks and mistakes. I keep hiding and reshowing the pencil layer as necessary until the pen completely replaces it.

Ink drawing
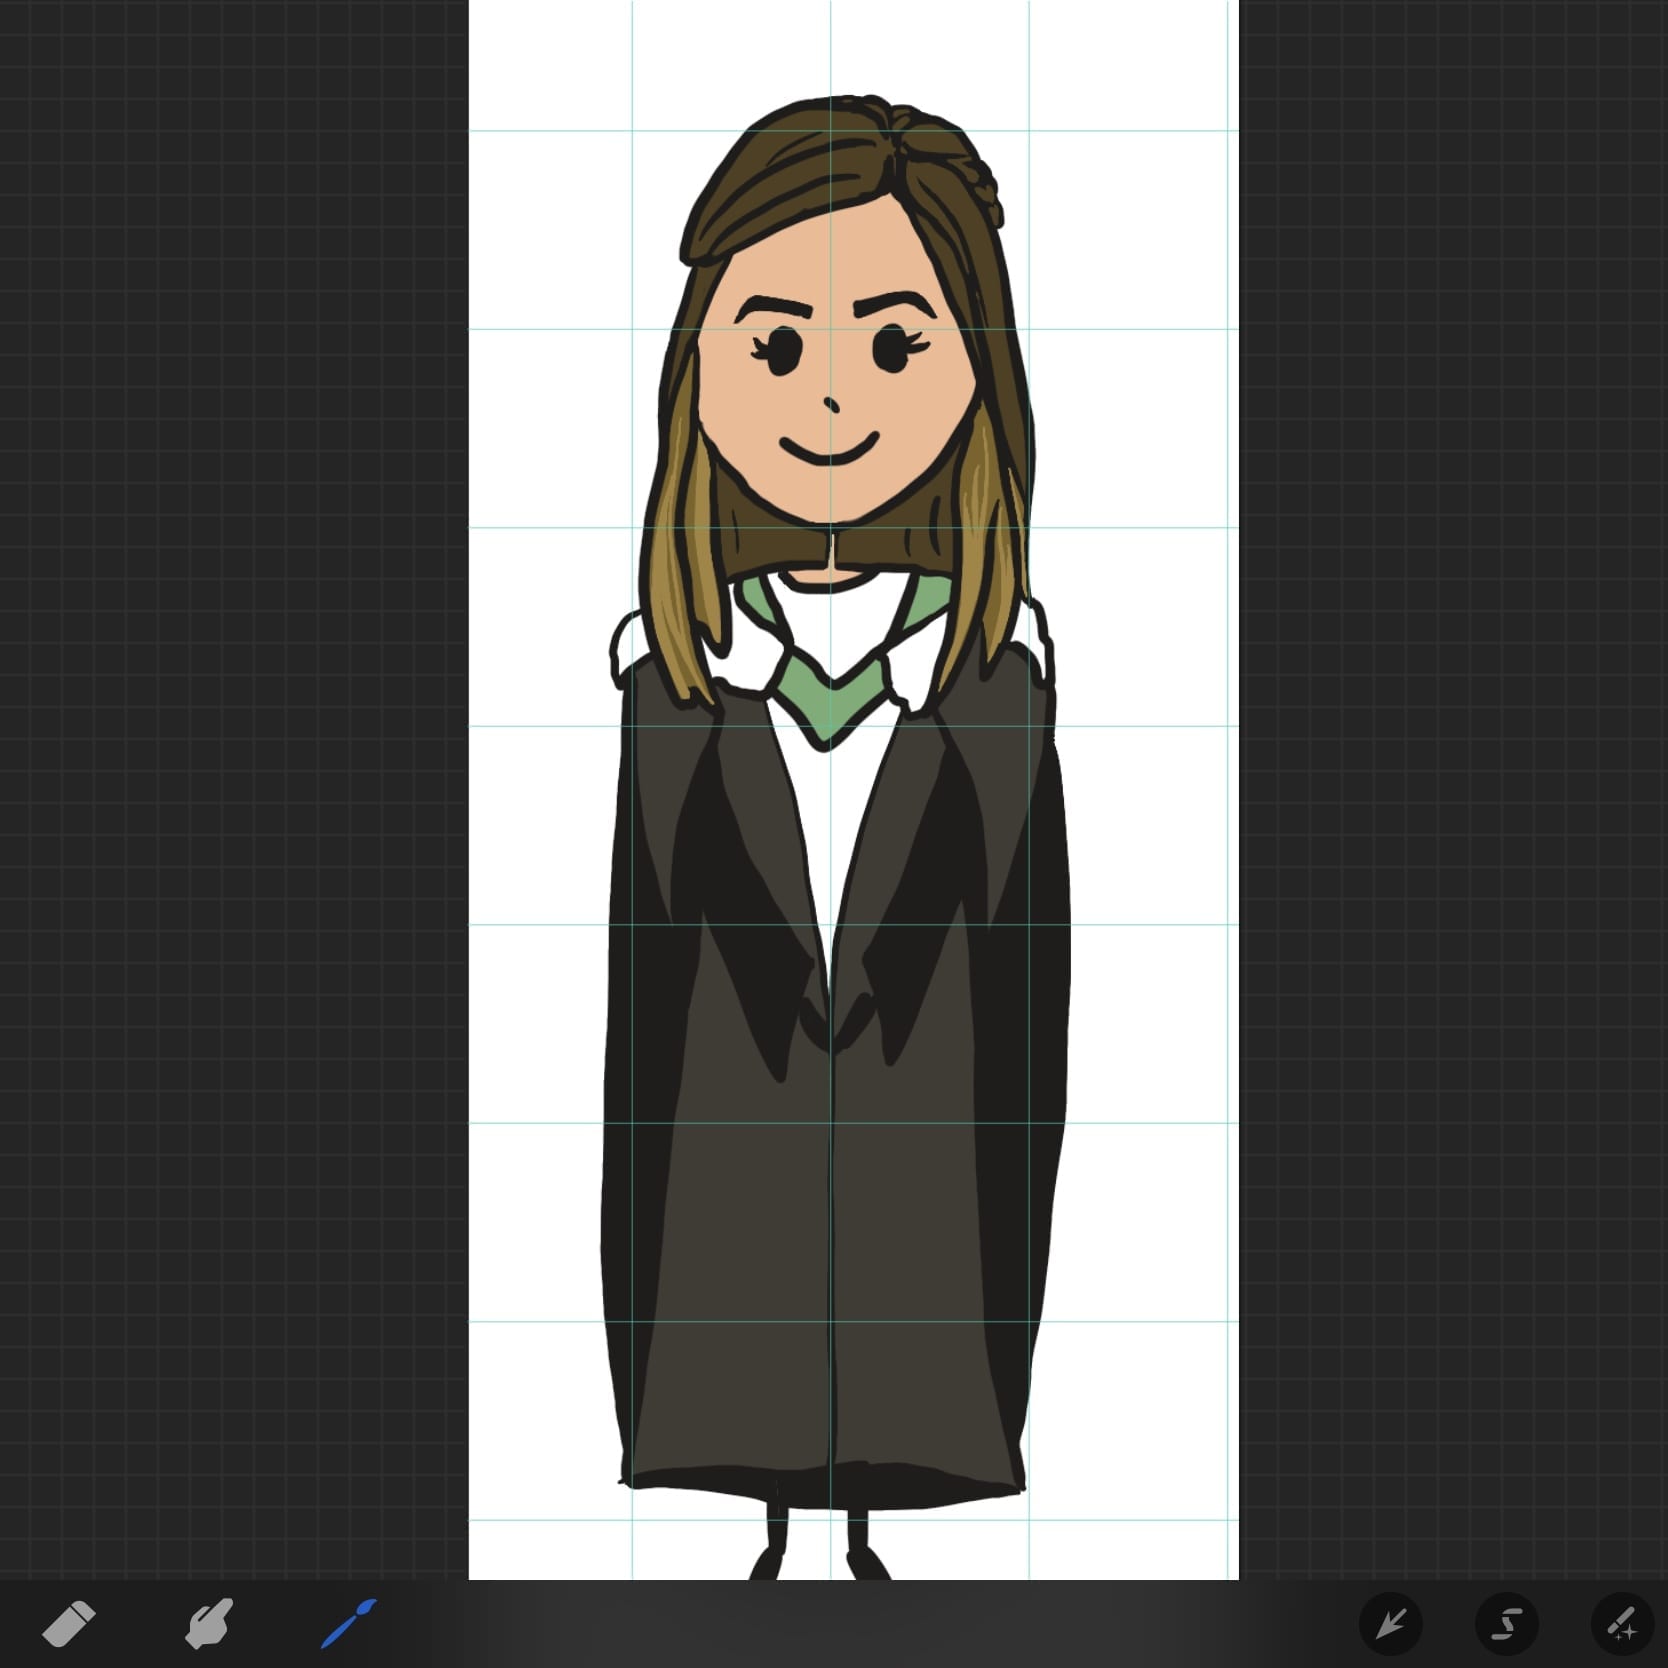
Once I’m satisfied with the ‘ink’ drawing I add the colours and then share it to my Mac. This is so much easier than scanning it in then removing any noise and marks from the scanner, adjusting the brightness and colour balance, etc. It’s just a simple AirDrop and I can add the image to a greeting card template I’ve created straight away.

Designing greeting cards - custom cartoon portrait

Designing Greeting Cards Videos

Another terrific feature on Procreate is that it creates a video replay of your creations. Would you like to see the full drawing process from start to finish for the cartoon portrait above? Well, here’s the video replay of it:

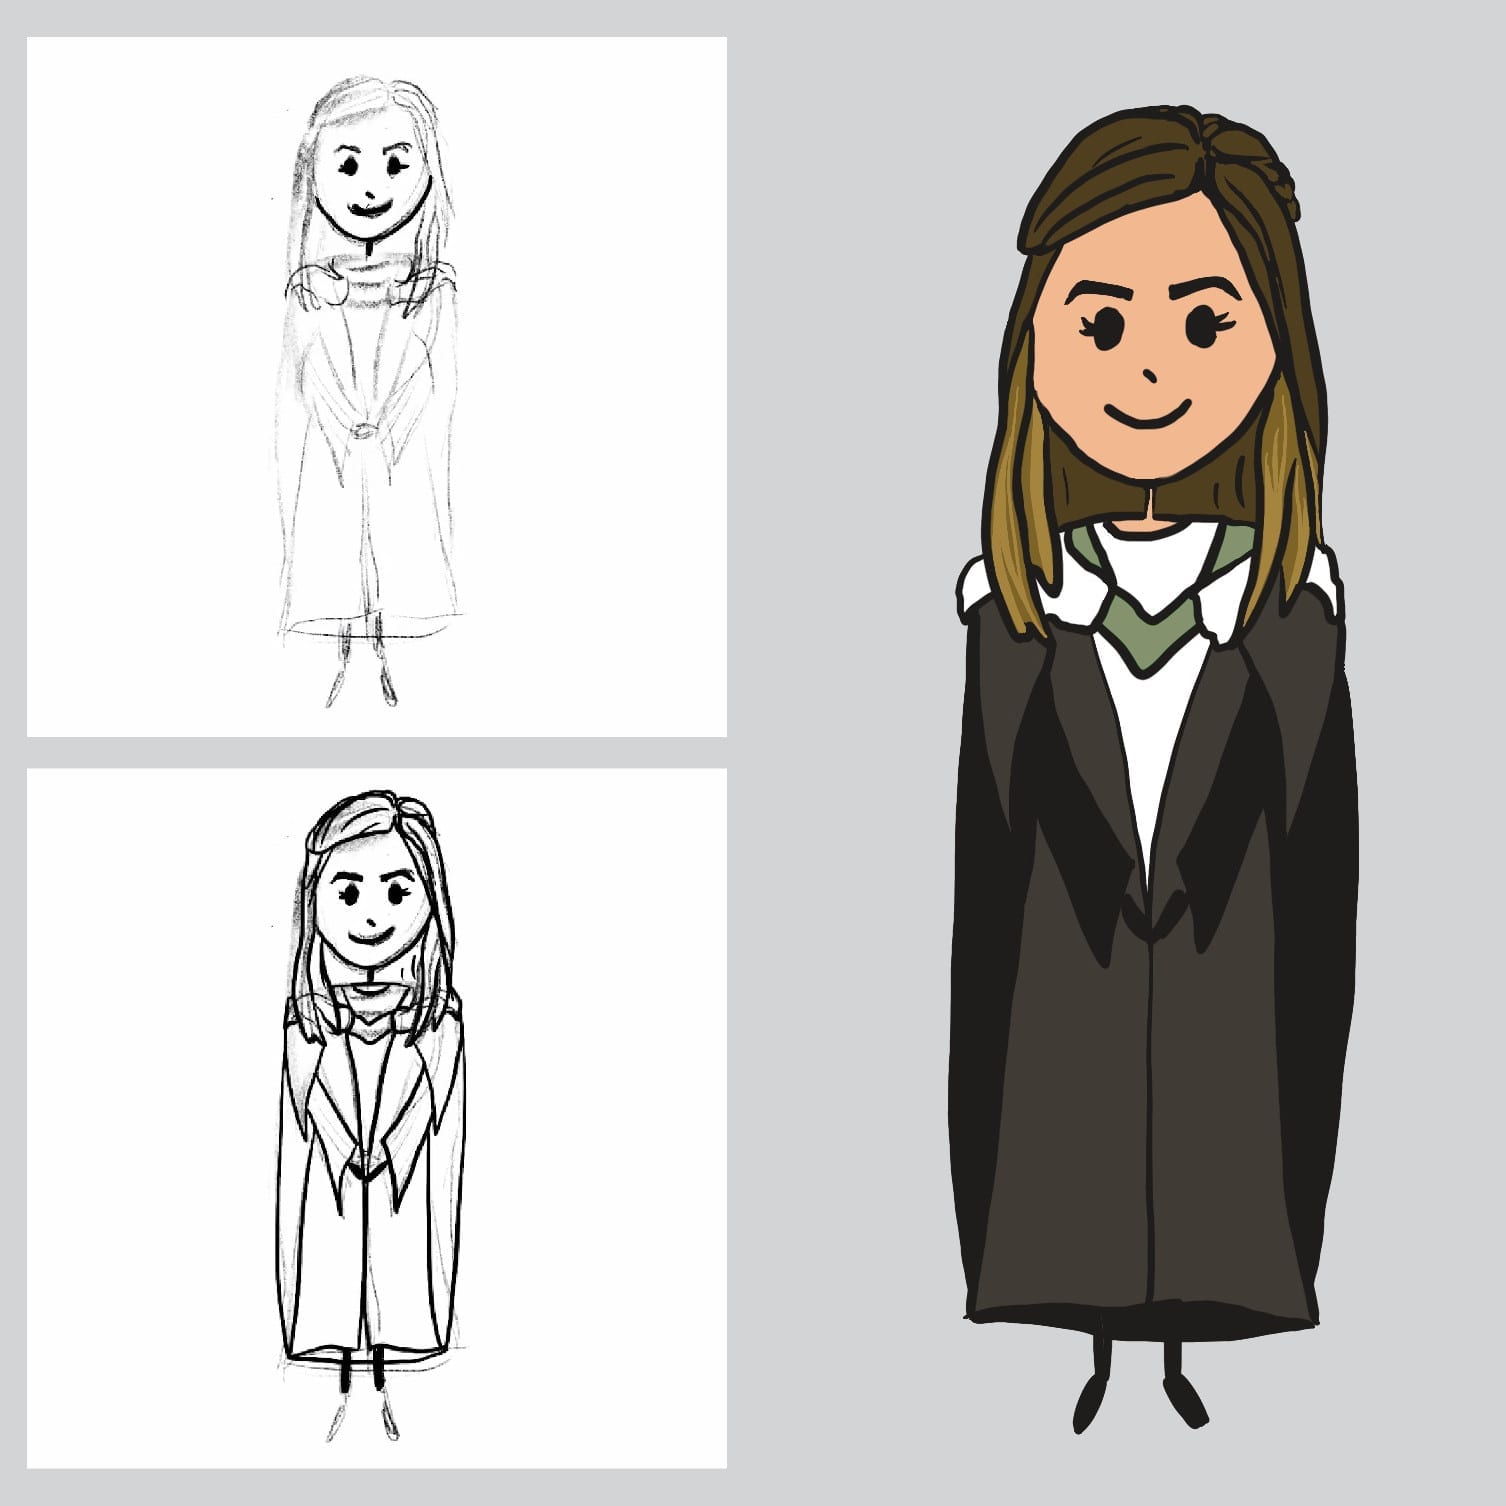
And here’s another – this time of a wedding cartoon portrait for an anniversary card.

So all in all I’m thrilled with my new purchases! Doing cartoon portraits is much quicker and easier. And I’ve been able to use it to draw quick images for blog posts or to design greeting cards for my ready to ship range as well.

If you’d like to see my range of greeting cards, including custom cartoon portraits and ready to ship cards, click on the Visit my shop button below or use the Menu.

VISIT MY SHOP
Posted on

My custom cartoon portrait process

Custom cartoon portrait process

I’ve been doing a lot of custom cartoon portrait orders for cards and prints over the last few years. People just seem to love seeing themselves and others in cartoon form! Read on to find out how I go about creating my stick figure portraits step by step…

First steps

When I get an order for a cartoon portrait card or print the first thing I do is get in touch with the customer to ask them to send photos and find out if they have any preferences regarding outfits, etc. If the photos show anyone both with and without glasses or a beard then I’ll double check which version they want. (I did once get two photos of someone’s Dad for a personalised birthday card which both showed him with a beard, and I was only when I sent the first proof that she told me he no longer had a beard… in a tone that seemed surprised I didn’t know this…)

Once I have the photos and other information I need to get started I open up my sketchbook and get started.

Layout of each custom cartoon portrait

I begin by very roughly sketching stick figures on the page in the positions and poses I want them in. This is helpful for getting proportions right in even one person portraits but is especially important when I’m doing larger family portraits for making sure they’re balanced. Check out this example from a family cartoon portrait I worked on recently:

Custom cartoon portrait layout
This sketch shows roughly where each family member will be in relation to each other.

I sometimes send this to the customer to check they’re happy with the layout, but usually only if there are at least four people in a family portrait.

Filling in the detail

The next step is to start working on each person’s head, working from the photos. This is the most important bit to get right in order for the customer to recognise the real people from the cartoon versions.

Custom cartoon portrait heads sketch
Here I used pencil to draw the detail of each person’s head and try to capture their likeness

Once happy with that I’ll move on to the bodies and add in any props or pets. You can faintly see how I draw the bodies and clothes around the original stick figure sketches.

pencil sketch of family
This example shows the pencil sketch once finished

I try to make sure I’m completely happy with this step before I move on, as it’s much easier to draw with pencil than to edit digitally later on. When I’m content that I’ve captured each person’s likeness I’ll use my Tombow brush pens* to go over the pencil in black ink. If necessary I’ll use my Derwent Graphik line maker pens* for any very fine details before rubbing out the pencil marks.

Inked sketch
This shows the inked version in my sketchpad – ready to scan in

Digitising the sketch

The drawing is now ready to scan in. I use the ‘Text’ setting in black and white to get the sharpest outlines I can. I leave the image rasterised rather than converting it to a line drawing as otherwise some of the detail can be lost and it also looks less hand drawn.

Custom cartoon portrait scanned
Here’s what the digital image looked like once it was scanned in

At this point I leave my pens and pencils behind and do all the rest of the editing digitally. I sharpen up the contrast and remove any marks that have come through on the scan but shouldn’t be there. I also fix any slips or mistakes I may have made in the inking stage.

Time to add colour! All the colour is digitally added, to make it easier to make any colour changes if the customer asks for them. I send a first proof to the customer to get their feedback once I’m happy with the digital image and colours .

cartoon portrait sketch first proof
Here’s the first proof I sent to the customer with colour added

Final edits

A lot of the time the customer accepts the first proof. However it also often happens that they ask for colour changes or realise that the photo they sent showed an older hairstyle, facial hair or glasses.

In the example above I’d been given instructions for outfits of two of the family members but omitted to check what the others should wear and did my own thing. This was foolish of me… In this case the customer felt that the two figures in orange and blue were too casual looking in relation to the rest. As a result I needed to digitally redraw these two outfits. (She also asked for a few colour changes but these are very easily done.) I’m now trying to ask more questions and get as much detail as possible before starting. This is much easier than having to edit digitally later, and I’m hopefully getting better at remembering to do this!

The finished product – how this custom cartoon portrait turned out

Once I’d made these edits and send a second proof the customer was very happy with her family portrait. I’ll always keep going until the customer is completely satisfied with what I’ve created! Here’s the finished product:

The final cartoon family portrait as sent to the customer

She also asked me to sign the portrait as she said I should get credit for my artwork, which I thought was really lovely of her! I’ve also done quite a few other cartoon portraits for her, so despite my mistake she remained a very loyal customer 🙂

So that’s my process! I love doing custom cartoon portraits. They result in me having a lot more interaction with my customers than I do with ready to ship orders that are just printed and posted off. Some really terrific customers come back again and again and I’m always so pleased to hear from them when they ask for another custom cartoon portrait for a new occasion.

Take a look at the range in my shop to see examples of all the different custom cartoon portrait cards and prints that I offer.

* These are affiliate links, which means that if you click on them and buy I will get a tiny commission on that product – it doesn’t cost you anything though! And I only add affiliate links to products I actually like and use (of course).

Posted on

Free colouring in pages for kids

Free colouring in pages

We’ve all been in lockdown for a while now, so I hope you’re all doing ok. It must be particularly difficult if you have young children at home to entertain, so I wanted to do what I could to help. I’m offering some free colouring in pages for kids which you can download and print off to keep them amused for a little while at least! Continue reading Free colouring in pages for kids

Posted on

New Valentine's Day cards

As well as the Couple Portrait Valentine Cards I wrote about last week, I’ve also added some other new Valentine’s Day cards to my Etsy shop – some ready to ship and one which can be personalised with your own photo. I’ve tried to create a range that appeals to different tastes, whether you prefer something soppy, cheeky or cute 🙂 Continue reading New Valentine's Day cards

Posted on

Valentine cards with cartoon portraits

Valentine cards have always been intriguing to me. When I was a kid there was always that anticipation that someone might fancy me enough to secretly give me a card, mixed with the slight dread that I might be the only one who wouldn’t get a Valentine… both of which happened a few times in different years. Continue reading Valentine cards with cartoon portraits